

Garden Journaling
It all begins with an idea.

Journaling to keep track of what was successful and the not so successful is the perfect way to set yourself up for next year.
January is a great time to start a journal for your garden. Garden tasks are less intense at this time in Middle Tennessee, so take the time to plan your garden layout, note what did and did not work last year, and what you would like to achieve in your garden this year.
Once you start journaling, you will not only feel more organized for the upcoming year, but also, for years to come.
Your journal is not only a place to note things such as when you planted your seeds, what type of fertilizer you used and when it was applied, but also any notes on the changes you want to make for the next season while it is still fresh in your mind. Little things like sunny perennials in a specific area that have been flourishing in previous years, are starting to struggle due to the maple tree on the adjacent property having put on quite a bit of size lately and is now casting too much shade. Or maybe it’s time to split your daylilies due to overcrowding. This is also time to start looking at all those seed and perennial catalogs to find that perfect splash of color you have dreamed of and make a wish list of new plants to add. These types of things can easily slip your mind over the winter months, and if you are anything like me, by the time you remember, it’s not the optimal time to do that task.
You might want to note tasks that are timing specific on a separate calendar or a list at the back of the journal to give yourself an “at a glance” look of scheduling priorities.
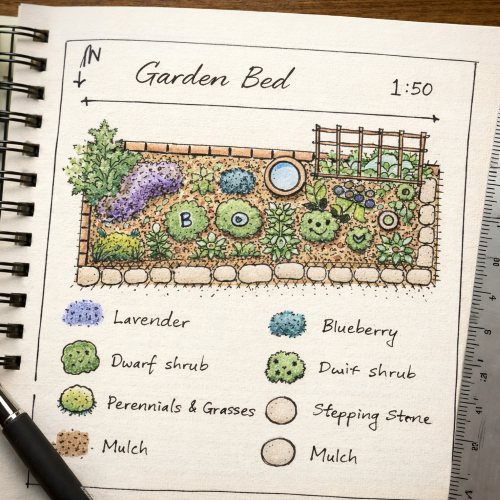
Sketching any lay-out changes or additions to your garden as ideas come to mind helps in next year’s planning.
Sketching any type of layout changes you want to see happen are a handy thing to have and won’t get lost when you need them, and if you add them to your journal, it’s easier to note changes for the following year.
Overall, I have found that I am much more productive with the limited amount of time I have to work in my garden since I have started to write a journal. My plants are in better condition, and I just truly enjoy sitting in the midst of things, taking notes while enjoying the fruits of my labor.
Frond Wishes for Happy Gardening!
The Landscape Landlord
It all begins with an idea.
When considering cleaning up your garden in the late fall and early winter, consider leaving some things that could provide food and shelter for area birds, until spring.
Depending on the severity of the weather here in Middle Tennessee, our feathered friends will need different types of plants to help them through the winter. Evergreens trees and shrubs are a definite plus during times of heavy winds and snow. Holding their needles/foliage all year, adds an extra layer of protection for these little guys. They can duck inside the inner branching and become shielded from strong winds. Although we don’t see a lot of snow here, compared to our northern states, these same plants can protect from that and the occasional ice storm that finds it way to our area.
Deciduous shrubs are often enough to help, especially those with tighter branching habits. As a rule, you will find plants with larger, or compound leaves have wider branching. For example, a Barberry with its tiny leaves has many more branches per square foot of plant than say, that of an Elderberry or Fig with their larger leaves. These open branching habitats are helpful in the fact that the larger birds can get in there easier, but most finches, sparrows, wrens and the like prefer a tighter branching habit when looking for a place to weather the storm.
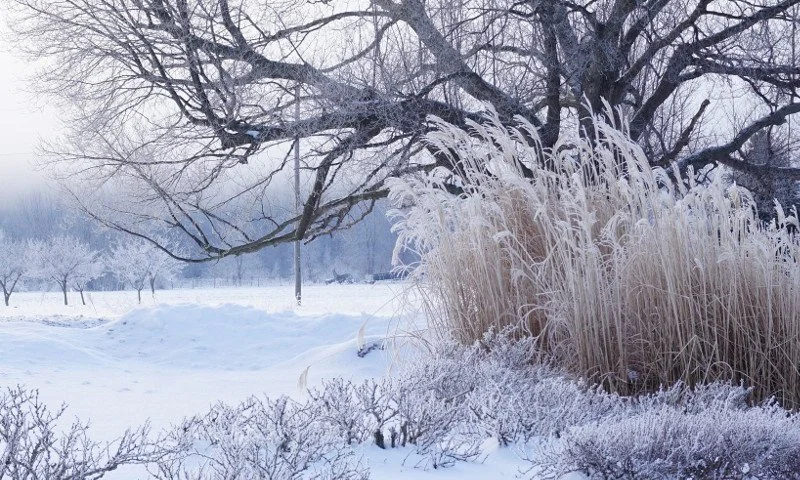
Ornamental grasses are beneficial as well. Although they are not suited for perching for birds of any size to them, when the wind is strong, the grasses supply dense cover at the ground level where our feathered friends aren’t as likely to be bouncing around on the branches of a tree or shrub.
Also, if left untrimmed, ornamental grasses can be a great supply of seeds during these colder months. The birds need to continually feed in order to keep their body heat up, so plants in your yard that have seed heads left until spring such as the aforementioned grasses along with Coneflowers, Rudbeckias, and Sunflowers to name a few, become a buffet for these little ones. Shrubs that produce berries are also a welcome site. Viburnums, Hollies, Dogwoods, Bayberries, and Sumac can hold their fruit throughout the winter providing the necessary food needed.
Your local Agricultural Extension or Department of Conservation have resources to help with wildlife friendly plants and many even have lists available on their website.
So, before you do any corrective pruning, tidying up in your beds, or planning for your 2026 garden, take a moment to think…are you a good Landscape Landlord?
Frond Wishes for Happy Gardening
Dahlias: To Dig or Not to Dig
Hitting the surface of how easy it is to care for the breathtaking Dahlia.
Yes, Dig!
Here in USDA Zone 7, we are technically in the “dig your Dahlia Tubers” range. Zone 8 is where folks can feel more comfortable about the success of their plant, if left to overwinter in the garden. As with everything in life, there are always exceptions, so it’s a good idea to check hardiness zones on the plants you purchase, which helps in taking away some of the fall/winter guess work.
When…
Knowing that we should dig, our next question should be, when? The best answer to that is “once we have had one or tow hard frosts.” This can vary greatly, with all the hills and valleys we have here in mid Tennessee. To add clarity, we’re looking for the kind of frost that bursts the vessels in the stems and leaves of your plants, like a water pipe left outside…undrained…in January. As you see the leaves turn brown/black, with a mushy appearance and stems start to fall over, the time to remove your tubers has arrived. At this point in the game, the plant is naturally dying back and transferring the energy from the leafy top of the plant, down to the tubers where it will be stored until need next spring.
How?
Taking a spade or gardening fork, dig down about 8-12” from the main stem, then, lift the group of tubers out of the soil, and gently shake, trying to remove the bulk of the soil. If your soil is a little heavier, you might need to get those fingers dirty and gently coax the soil out from in between the various sized potato shaped tubers hanging from the main stem. You can also spray them clean with water, just be sure to pat them dry to remove the bulk of the water. Once they are out of the ground and relatively clean, it is important to allow the tubers to dry in a warm, well-ventilated area for a couple days (more if the soil was soggy when dug). Next, we like to store them in cardboard boxes, brown paper bags, or wooden crates with slightly moist peat moss, wood shavings, kitty litter, or vermiculite, making sure to label each container with the variety (I include color and size as well) so you are ready to go when spring arrives.
Dividing / Splitting
Dahlia tubers can multiply from a purchase of a plant with 1-2 tubers when planted, to having anywhere from 5-20 tubers hanging onto that main stem that very fall. Things that help determine the amount you will have depends on a list of variables such as the variety of the plant, soil type, the amount of watering, fertilization, and pinching they were giving during the growing season, just to name a few.
Although it’s undeniable that when tuber production is high in the summer, that they should be split to encourage new growth and avoid disease and rot during the dormant season, there are different opinions on when the splitting should occur. Splitting in fall before storage insures that the tubers have more air space around them (alleviating the tightly bunched grouping you dug up) which helps reduce risk of mold and disease while stored over the winter. It also takes care of a task in fall while the demands of the garden are much less, leaving you pretty much ready to drop them in the ground come spring. Others feel that cleaning and drying is the only thing needing done before storing, and to split the tubers in spring give you the chance to cull anything that may show signs of mold, desiccation, or rot which may have occurred over the winter. I like the fall option, and then just do a quick double check on their health before getting them in the ground.
Why?
So why split the tubers? It helps alleviate overcrowding and allows for each tuber to develop into a healthier plant as the underground portion of your plant will have ample room to grow. You can separate tubers from the main bunch with either a sharp pair of pruners or a sharp knife. Each group needs to have a neck and an eye. Without either of these, the plant will not regenerate. Also assuring that the tubers are firm, with no fractures or slices into the flesh, no smell of rotting and not showing spotting on the exterior. All tubers should be light brownish tan in color. It is important to know that each variety of Dahlia may have a widely different tuber shape and size. That means that one which might be longer and more slender with just a couple wrinkles, doesn’t make it a “bad” tuber when going up against some of the more plump, roundish, and robust varieties.
With all this being said, let’s see what we can dig up this weekend! Gardening is truly “the circle of life” and with a small amount of assistance, that circle can be an amazingly beautiful place!
Frond Wishes for Happy Gardening
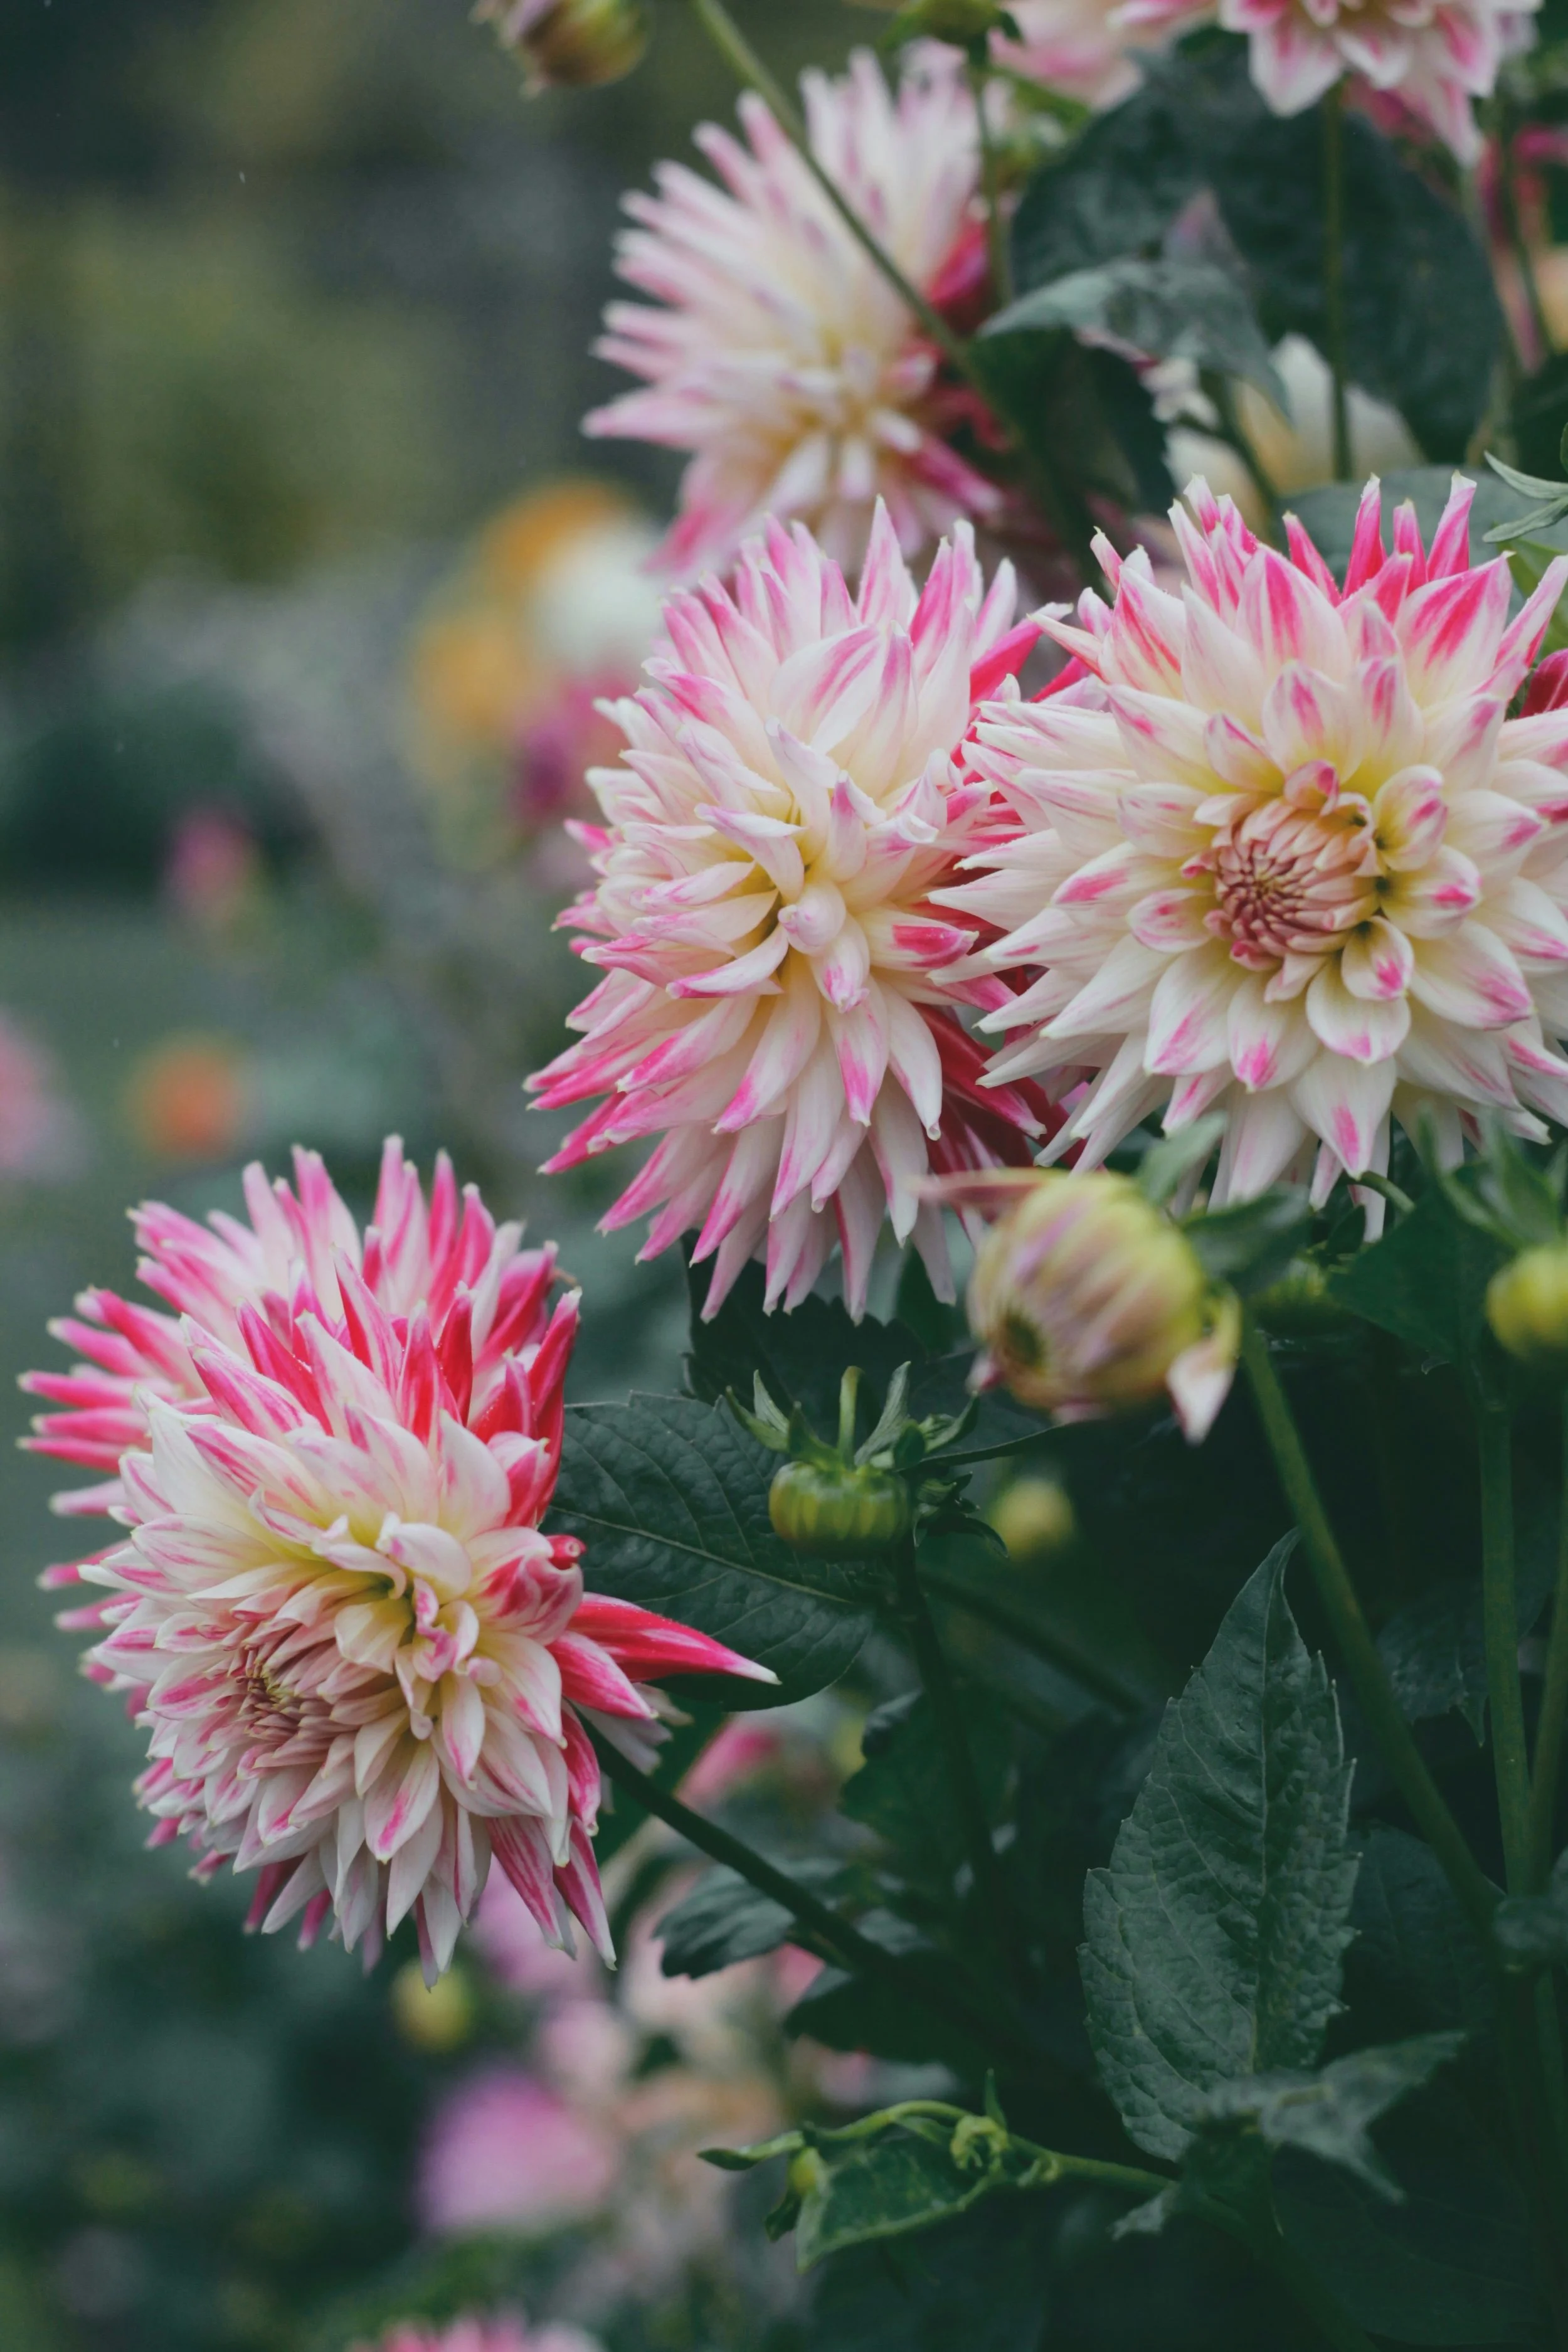
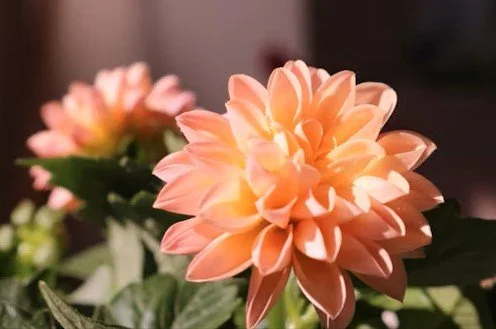
The breathtaking blooms of the Dahlia family.
photo credit: Elena Cosarca
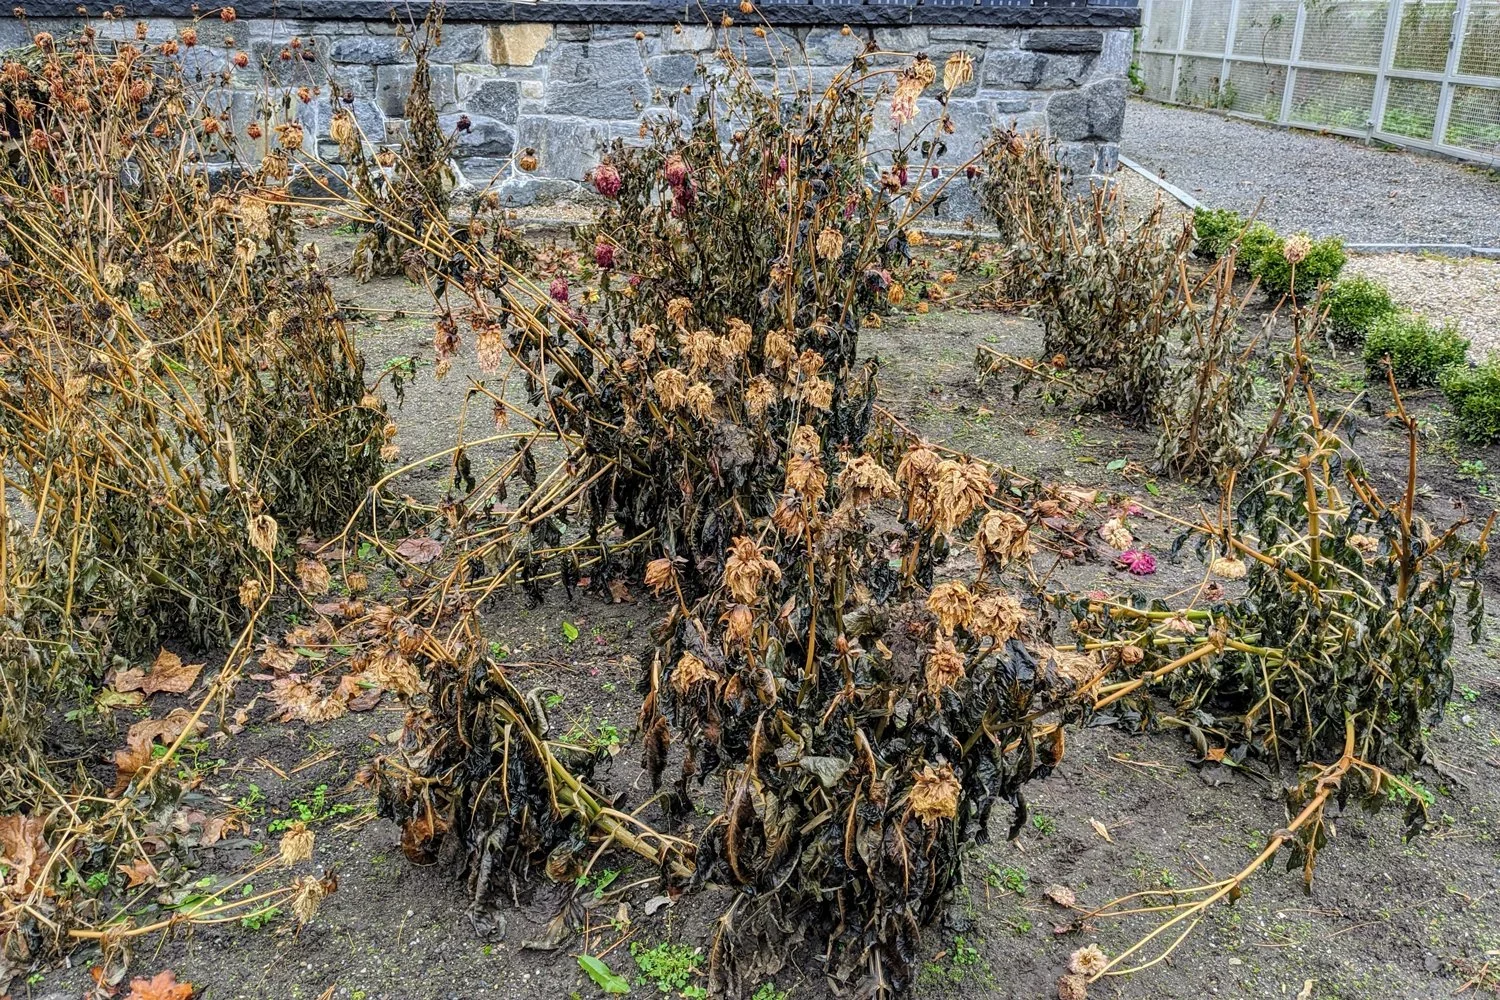
Dahlias after a hard frost.
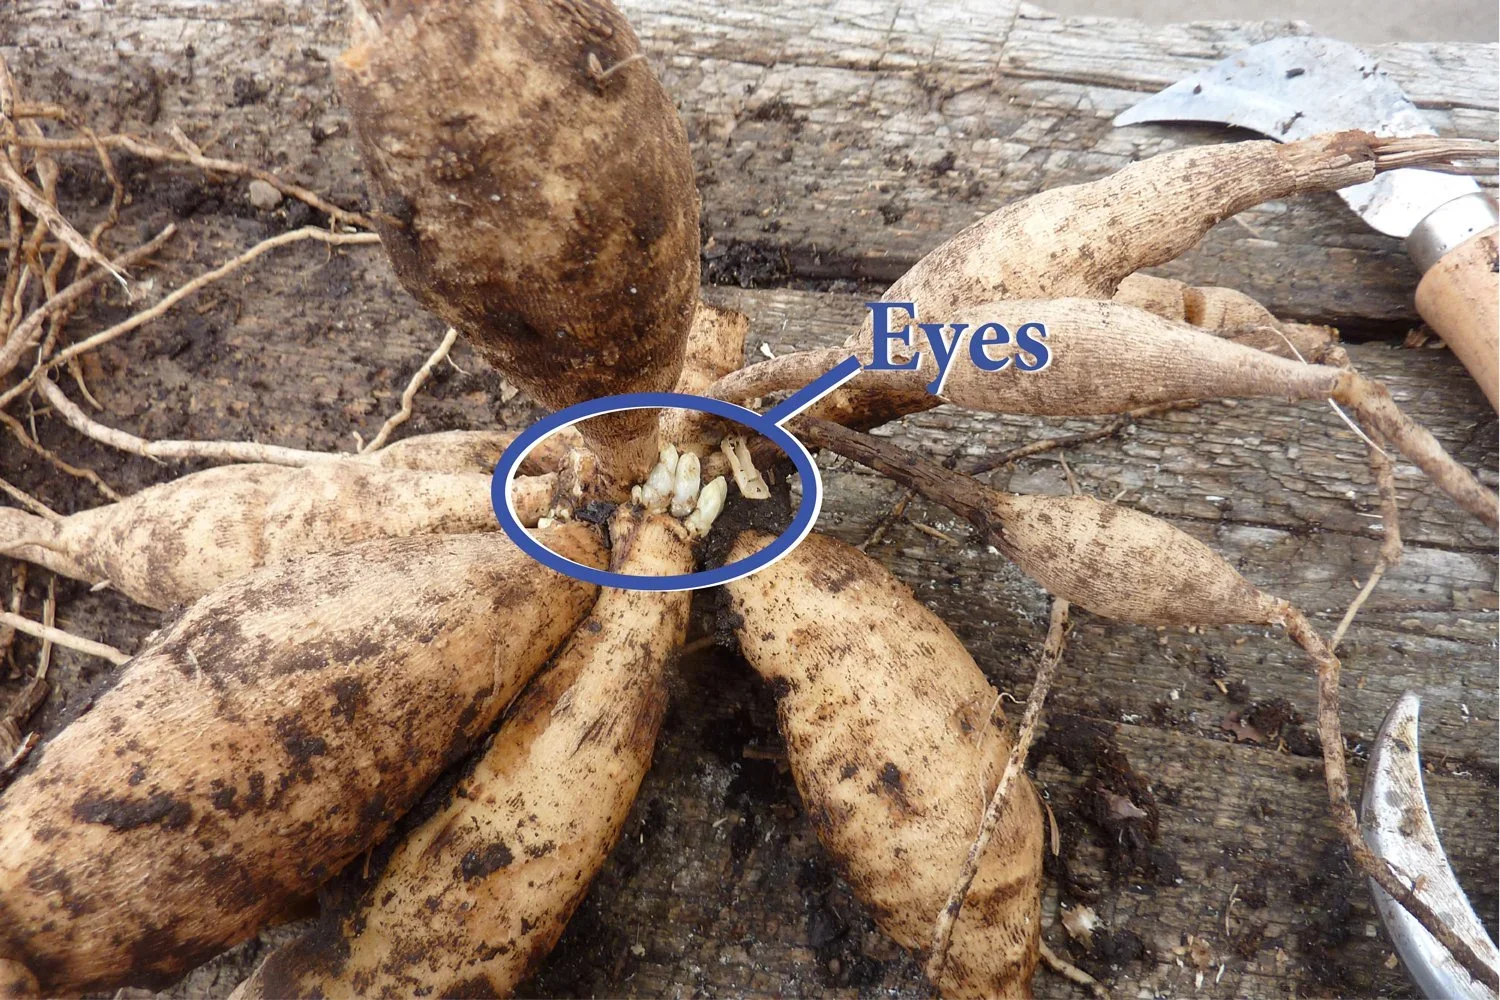
Dahlia tubers after cleaning, showing the “eyes” of next season’s growth.

Winter Plant Care
Winter Plant Care
Yes, the time for winter plant care is quickly approaching. Attending to certain tasks during our garden’s “off season”, can significantly ease the task load of the upcoming growing season. One of these important tasks is using Horticultural Oils for Dormant Spraying. Horticultural Oils effectively can eliminate overwintering pests such as scales and aphids along with fungal spores and eggs from other pests by essentially smothering them.
Application Guidelines
Horticultural Oil is most effective as a dormant spray when applied three times between November and February for our Mid-Tennessee temperate zone. For ease of remembering the timing, I like to use dates that we all typically keep in our heads anyway assuming they align, so here we go!
First Spray: Apply right around Thanksgiving after 75% or more of the leaves have fallen OR after or first heavy frost if that comes before.
Second Spray: This application should take place around Christmas when the trees are fully dormant and all leaves have dropped.
Third Spray: This last application should occur around Valentine’s Day when you notice the first signs of buds swelling or green appearing on the emerging buds
You can apply more frequently on older material, but never more than once every 30 days.
Best Practices for Spraying
Ensure the temperature will remain above 40 degrees for at least 24 hours post-application but remains below 70 degrees.
Always apply either early in the morning or in the evening - not midday.
Choose a calm and dry day to spray; avoid windy conditions and wet plant material.
Thoroughly coat stems and branches to ensure all crevices are covered without dripping.
Refrain from applying as a Dormant Oil within 30 days of using a sulfur based pesticide.
Please remember to thoroughly clean your spray equipment after each use to prevent clogging. A small amount of oil can be used to help winterize equipment and keep things clean and rust free.
Keep in mind that these are all general practices and you should follow the instructions on the labels for concentration rates used for Dormant Spraying and plant compatibility as each brand may vary.
Frond Wishes for Happy Gardening!